Do you ever feel a nagging tightness in your hips after a long day of sitting? That sensation is more than just a minor annoyance—it's your body's cry for movement and release. Our modern, sedentary lifestyles can cause our hip muscles to become chronically tight, leading to discomfort in our lower back, knees, and overall posture. This is where the transformative power of hip stretch yoga comes in. Far from being just a trend, it's a vital practice for unlocking freedom of movement and reclaiming your natural range of motion. This guide is your first step toward releasing that tension. We’ll walk you through the profound benefits of hip openers and provide a safe, foundational sequence designed specifically for beginners, especially if you're looking for a great introduction to hip opening yoga for beginners. Get ready to say goodbye to stiffness and hello to a new level of comfort and ease in your own body.
Why Your Hips Hold the Key to Your Comfort: The Benefits of Hip Stretch Yoga Poses
Tight hips are like a traffic jam in the center of your body; they create congestion and problems everywhere else. The hip region is a complex network of some of the body's largest and most powerful muscles, including the glutes, hip flexors, adductors, and deep external rotators. When these muscles are chronically short and tight, they pull on the pelvis and spine, creating a cascade of physical issues.
A consistent hip stretch yoga practice offers a direct solution with wide-ranging benefits.
- Alleviates Lower Back Pain: Tight hip flexors pull the pelvis into an anterior tilt, arching the lower back and creating compression. Stretching these muscles allows the pelvis to return to a neutral position, taking immense pressure off the lumbar spine.
- Improves Posture and Alignment: The hips are the foundation for your spinal column. Open hips enable you to stand and sit taller with less effort, correcting the slouched posture that comes from prolonged sitting.
- Enhances Mobility and Range of Motion: Simple, everyday movements like walking, climbing stairs, and bending over become fluid and effortless. You’ll move through life with greater ease and less restriction.
- Reduces Risk of Injury: Flexible, supple hips absorb impact and distribute force more evenly during physical activity. This protects the knees, ankles, and lower back from strain and overuse injuries.
- Releases Stored Tension and Stress: The hips are a well-known storage site for emotional and physical stress. The deep, mindful stretching in yoga can trigger a release of this held tension, leading to a feeling of lightness and emotional calm.
A Beginner's Guide to Safe and Effective Hip Stretching
Jumping into deep stretches without proper preparation can do more harm than good. The goal is to create length and space, not to force your body into a picture-perfect pose. Keep these foundational principles in mind for a safe and rewarding practice.
- Breathe Deeply: Your breath is your most powerful tool. Inhale to create length in your spine, and exhale to gently sink deeper into a stretch. Never hold your breath. If your breathing becomes shallow or strained, you have gone too far.
- Listen to Your Body: Distinguish between a productive "good" stretch and sharp, shooting, or radiating pain. The former is a sensation of release; the latter is a warning sign. Back off immediately if you feel any pain.
- Focus on Sensation, Not Shape: Your pose does not need to look like a textbook image. Feel the stretch in the intended area. Use props like yoga blocks, blankets, and straps generously to support your body and make the poses accessible.
- Be Consistent, Not Forceful: Five to ten minutes of gentle stretching every day is far more effective than a brutal one-hour session once a month. Consistency builds flexibility safely over time.
- Warm Up First: Never stretch cold muscles. Start with a few minutes of gentle movement to get the blood flowing, like cat-cow stretches, gentle torso twists, or marching in place.
Your Foundational Hip Stretch Yoga Pose Sequence
This sequence is designed to systematically target all the major muscle groups around the hips. Move through each pose slowly and mindfully, holding each for 5-8 deep breaths.
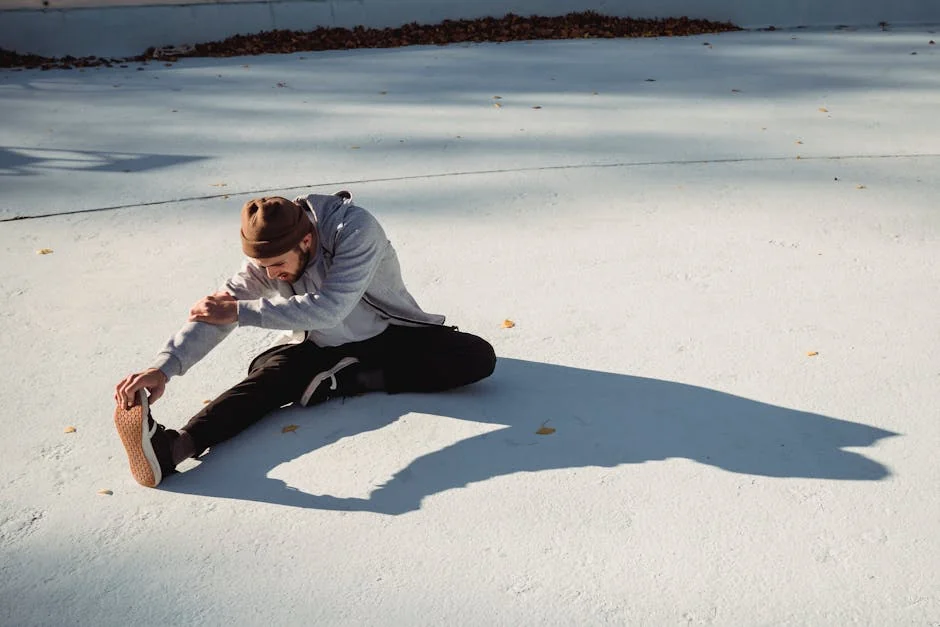
Reclined Hand-to-Big-Toe Pose (Supta Padangusthasana)
This supine pose is a perfect starting point as it allows you to isolate and stretch the hamstrings and hips without compromising your lower back.
- Lie flat on your back with both legs extended. Hug your right knee into your chest.
- Loop a yoga strap around the arch of your right foot, holding one end of the strap in each hand. If you don't have a strap, hold the back of your thigh.
- Gently press your left thigh down toward the floor. Inhale and extend your right leg up toward the ceiling, keeping it as straight as comfortable.
- Keep your shoulders relaxed and your head on the floor. After several breaths, slowly open the right leg out to the side to stretch the inner thigh, then return to center and switch legs.
The Essential Hip Stretch Yoga Pose: Happy Baby (Ananda Balasana)
This calming pose provides a deep release for the inner thighs, hips, and groin while gently tractioning the spine.
- Lie on your back and draw your knees toward your armpits.
- Flex your feet and grab the outer edges of your feet. If you can't reach your feet, hold your ankles or shins.
- Gently pull your knees down toward the floor, wider than your torso. Aim to bring your knees toward your armpits, not your chest.
- Keep your tailbone on the mat and avoid crunching your shoulders. Gently rock from side to side if it feels good.
Butterfly Pose (Baddha Konasana)
A classic hip opener, this pose targets the adductors (inner thighs) and the external hip rotators. For a complete guide on this specific pose, including its full range of benefits, check out our article on the yoga butterfly stretch.
- Sit on the floor with your legs extended in front of you. Bring the soles of your feet together and let your knees fall out to the sides.
- Sit up tall, lengthening your spine. If your lower back is rounding, sit on a folded blanket or yoga block.
- You can stay upright, or for a deeper stretch, hinge forward at your hips, keeping your back long. Lead with your chest, not your forehead.
- Avoid bouncing your knees. Instead, focus on relaxing your hip muscles and allowing gravity to do the work.
Pigeon Pose (Eka Pada Rajakapotasana) Variation
Often called the king of hip openers, this pose provides a deep stretch for the external rotators of the back leg's hip.
- Start on your hands and knees (Tabletop position). Bring your right knee forward toward your right wrist, and place your right ankle near your left wrist. Your shin can be parallel to the front of the mat or at an angle.
- Slide your left leg straight back, keeping the hip descending toward the floor. Use a blanket under your right hip if it is floating high off the ground.
- Keep your hands on the floor and your torso upright, or fold forward over your front leg, resting on your forearms or a pillow.
- Ensure there is no pain in your front knee. The sensation should be in the hip of the back leg. Repeat on the other side.
A Powerful Quad Stretch Yoga Pose: Low Lunge (Anjaneyasana)
This dynamic pose is a fantastic quad stretch yoga pose that also opens the hip flexors of the back leg.
- From a Tabletop position, step your right foot forward between your hands.
- Lower your left knee to the floor and slide the foot back until you feel a comfortable stretch in the front of your left hip and thigh.
- Keep your right knee stacked directly over your right ankle. Inhale and lift your torso upright, bringing your hands to your right thigh or sweeping your arms overhead.
- Tuck your tailbone slightly and gently press your left hip forward. To deepen the quad stretch yoga pose, reach back with your left hand and grab your left foot, drawing the heel toward your glute.
Goddess Pose (Utkata Konasana)
This pose combines a hip opener with strength-building, stretching the inner thighs and groin while engaging the glutes. It's a fantastic example of the kind of powerful closed hip yoga poses that build stability as they open.
- Stand with your feet wide apart, about 3-4 feet. Turn your toes out and your heels in.
- Bend your knees deeply, tracking them over your ankles. Lower your hips until your thighs are parallel to the floor.
- Keep your torso upright and your tailbone descending toward the floor. Engage your core.
- Hold the pose, or pulse gently by straightening and bending your legs. Bring your hands to your heart center or extend your arms out to the sides.
Seated Forward Fold (Paschimottanasana)
This pose provides a complementary stretch for the entire back body, including the hamstrings and hips, promoting an overall sense of release.
- Sit on the floor with your legs extended straight in front of you.
- Inhale to lengthen your spine, and exhale to hinge forward from your hips, not your waist.
- Reach for your shins, ankles, or the outer edges of your feet. If your back is rounding, place a pillow on your legs and rest your head there.
- Keep your knees slightly bent if needed to protect your hamstrings. Focus on the sensation of lengthening, not how far you can fold.
Creating a Simple Hip-Opening Yoga Flow for Daily Practice
String the poses together into a fluid, 10-15 minute sequence you can do daily. Move with your breath, holding each pose for 5-8 breaths.
- Begin in a comfortable seat or lying down, taking a few moments to connect with your breath.
- Reclined Hand-to-Big-Toe Pose: Stretch each leg, followed by Happy Baby Pose to release the inner hips.
- Transition to your hands and knees. Flow through Cat-Cow for 5 rounds to warm up the spine.
- Step into Low Lunge on the right side for your quad stretch yoga pose. Hold, then step back to Downward-Facing Dog or Tabletop.
- From Tabletop, move into Pigeon Pose on the right side. Hold, then gently transition back to Tabletop.
- Repeat steps 4 and 5 on the left side (Low Lunge left, then Pigeon Pose left).
- From Tabletop, push back into Child's Pose for a brief rest.
- Come to a seated position. Move into Butterfly Pose, then straighten your legs for Seated Forward Fold.
- Finish by lying on your back in a comfortable position (Savasana) for 1-2 minutes, allowing the benefits of your practice to integrate.
Common Mistakes and How to Correct Them in Your Hip Stretch Yoga Practice
Awareness of common errors will make your practice safer and more effective.
- Mistake: Forcing the Stretch. Pushing yourself to the point of pain activates the body's stretch reflex, causing muscles to contract protectively.
- Correction: Back off to about 70% of your maximum capacity. The stretch should feel strong but not unbearable. Let your breath guide you deeper over time.
- Mistake: Rounding the Back in Forward Folds. This places strain on the lumbar spine and minimizes the stretch in the intended muscles.
- Correction: Focus on hinging from the hips. Imagine your torso is a seesaw, pivoting from the hip joints. Keep your spine long, even if it means you don't fold very far.
- Mistake: Letting the Knee Wobble in Pigeon Pose. Allowing the front knee to drift too far to the side in Pigeon can stress the knee joint.
- Correction: Ensure your front shin is positioned at a safe angle, and use a blanket for support under the hip. The sensation should be in your hip and glutes, not your knee.
- Mistake: Holding Your Breath. This creates tension in the body, working directly against the goal of release.
- Correction: Cultivate a steady, audible Ujjayi breath. The sound of your breath can be a focal point, helping to calm the nervous system and deepen the stretch.
- Mistake: Neglecting Symmetry. The body is often tighter on one side.
- Correction: Always practice poses on both sides, and consider holding the tighter side for a few breaths longer to encourage balance.
Conclusion: Embrace the Journey to More Open Hips
The path to open, fluid hips is a journey of patience and self-awareness, not a race to a destination. Your body holds a unique history, and your hip stretch yoga practice is an opportunity to listen to it and offer it kindness. Consistency is your greatest ally. By returning to this foundational sequence regularly, you will gradually dissolve layers of physical and mental tension stored in your hips. You will stand taller, move more freely, and sit with greater comfort. The sense of liberation that comes from unlocking your hips extends far beyond the physical; it brings a profound feeling of ease and vitality into your daily life. Unroll your mat, take a deep breath, and begin.
In summary, dedicating time to hip stretch yoga is a profound investment in your long-term physical and mental well-being. The journey through various poses, from the grounding Pigeon to the expansive Butterfly, illuminates a clear path toward releasing deep-seated tension and reclaiming a natural range of motion. This practice transcends mere flexibility; it is a vital tool for counteracting the stiffness of modern sedentary life, alleviating lower back discomfort, and calming the nervous system. The key takeaway is that consistency, not intensity, unlocks the greatest benefits. Your hips hold a lifetime of stories, and with patient, regular practice, you can gently encourage them to let go. Begin where you are, honor your body’s unique needs, and trust in the process. Unroll your mat today and take that first, powerful step toward greater freedom, resilience, and inner peace.